Automating my project workflow with Bash scripting
Table of Contents
Welcome to another episode of spending 4 hours to automate something that would take me 5 minutes to manually do 😂But hey, this was a fun project to do and it proved useful in my day to day project workflow.
In this article, I will show you how you can automate your workflow too :)
How does my workflow look like #
Besides being a CTF player, I am also a freelance web developer. This means I take on a number projects from time to time and experiment with different technologies occasionally.
Identifying recurring tasks in the workflow #
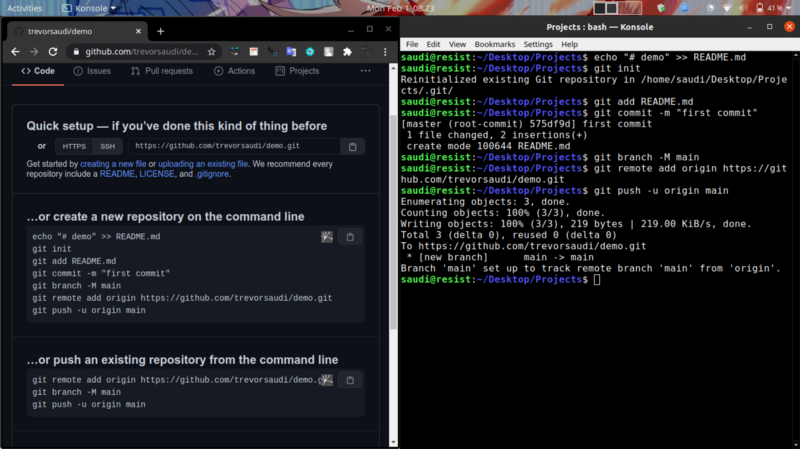
My workflow is coupled up with a ubiquitous setup process where I login to github, create a new project, go to my terminal and create a directory for the project, connect the local repo to my remote repo, make an initial push to my repo then finally opening my editor to actually work on the project. The github REST API and a few lines of bash is all we need to automate this entire process.
The github API and Bash Scripting #
The github REST API allows you to manage issues, branches, repos and more. In this case, we will consume the API to help us create a repository.
What you will need #
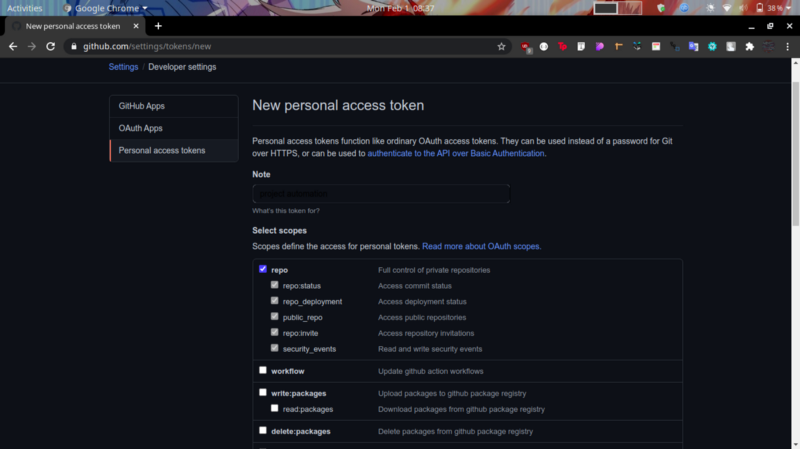
Before actually consuming the REST API, you will need to generate a personal access token that allows us to authenticate against the API. Head over to https://github.com/settings/tokens and generate a new token.
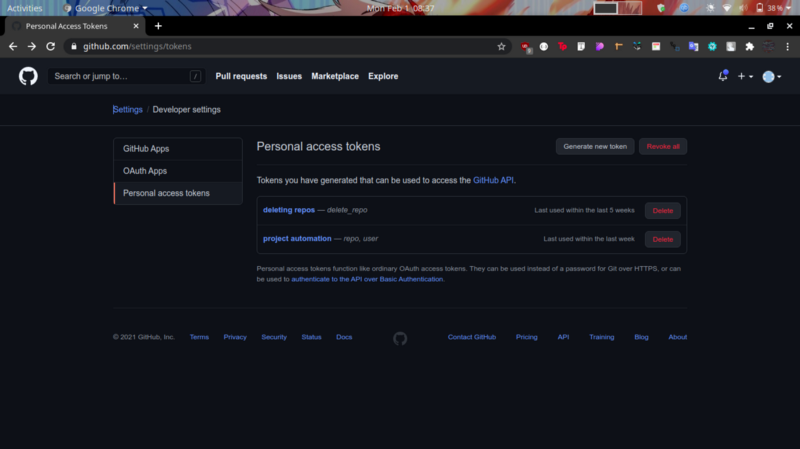
Select on the repo option in the scopes and make sure to copy and save the generated token somewhere.
Environment variables #
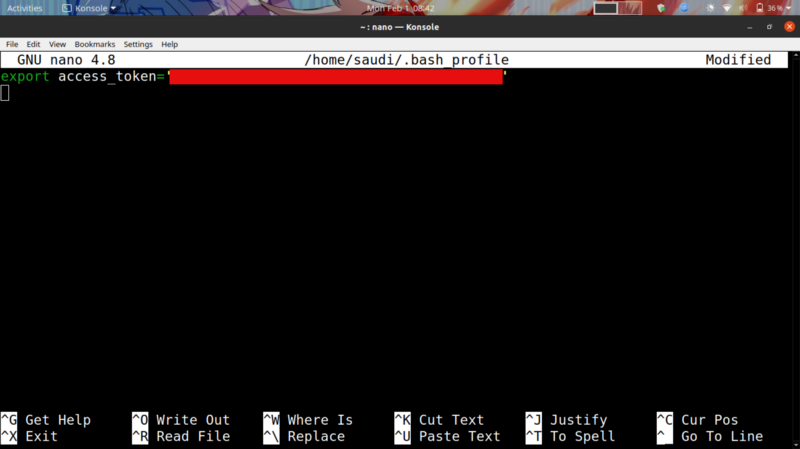
In the context of linux, environment variables come in pretty handy in storing sensitive information like passwords and tokens that you don’t want exposed when working on projects.
Editing into the ~/.bash_profile helps you store your personal token safely.
In the context of windows. This is how you can set your own environment variables. In the Start menu, search for ‘environment variables’ and click on this option
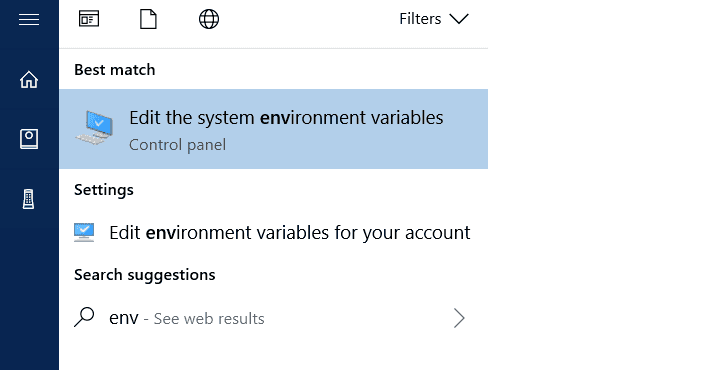
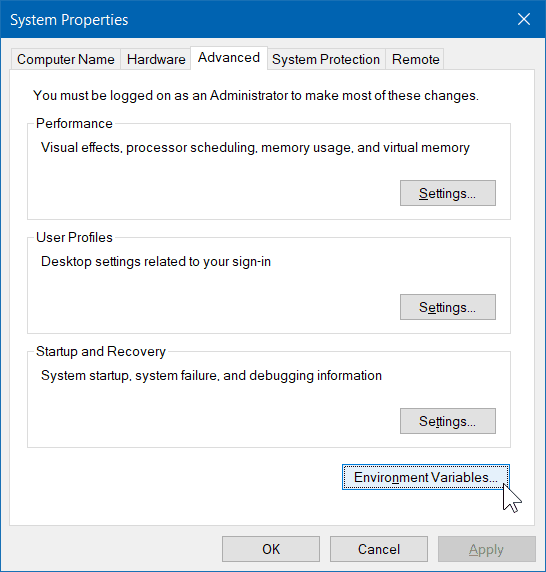
Click on this option
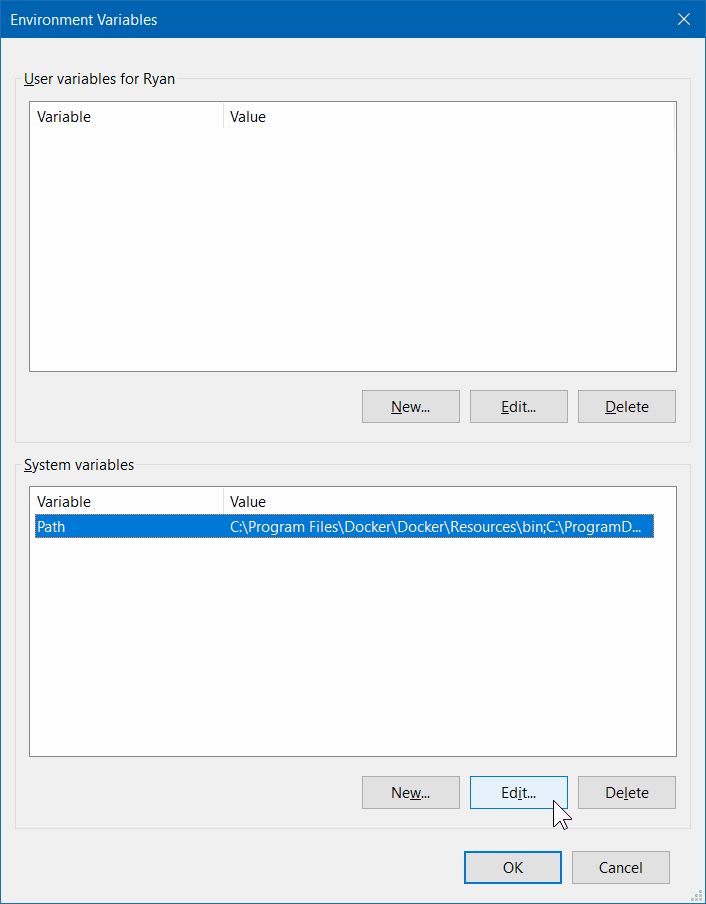
Click on new , paste in your access token and save the changes
Testing the REST API #
We will test github’s REST API endpoint with our personal access token using curl — a command line tool that comes pre-installed in most operating systems and can be used to handle HTTP requests and responses and also transferring data in a network.
The github API docs is pretty well written and came in handy.
Sending an authentication curl request to the API returns no errors
curl -H "Authorization: token $access_token" https://api.github.co
m`
``

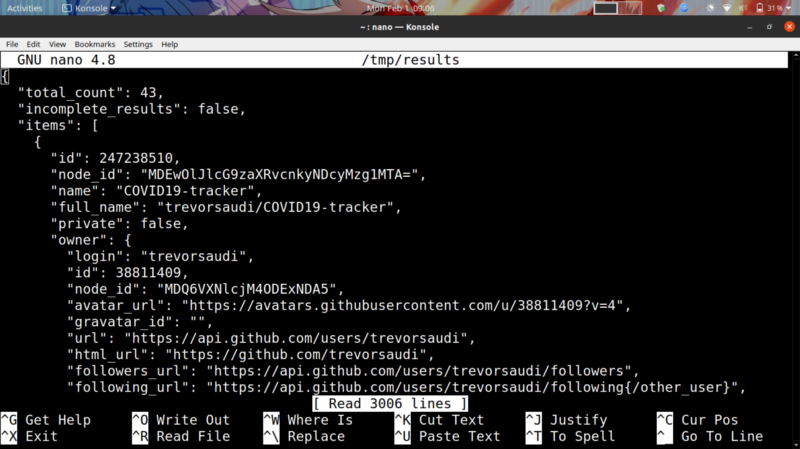
We can try querying for repos
```bash
curl -H "Authorization: token $access_token" "https://api.github.c
om/search/repositories?q=user:trevorsaudi" | less
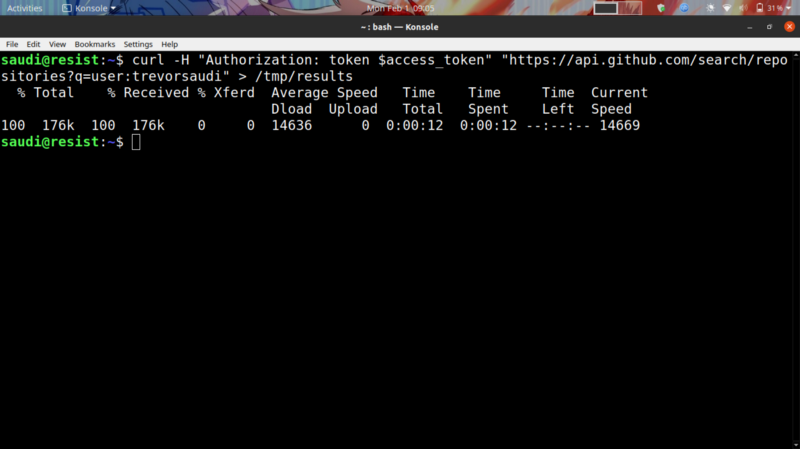
We get all our repos
Let’s try creating a repo using the access token
curl -i -H "Authorization: token $access_token" -d '{"name": "demo
","auto_init": false,"private": false}'  https://api.github.com/us
er/repos
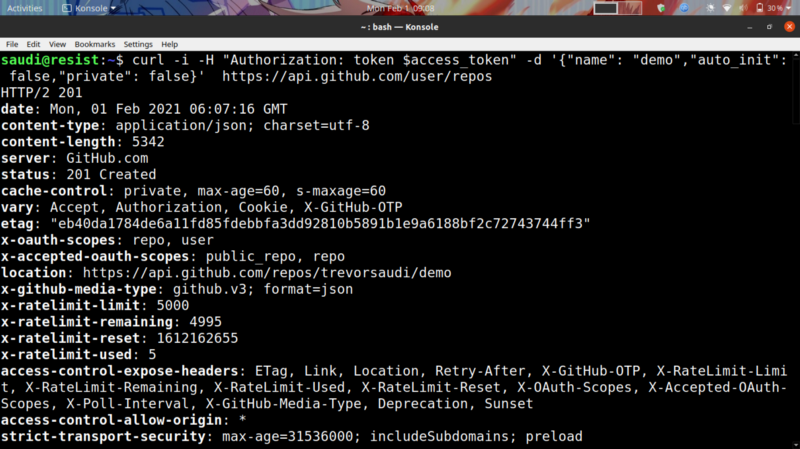
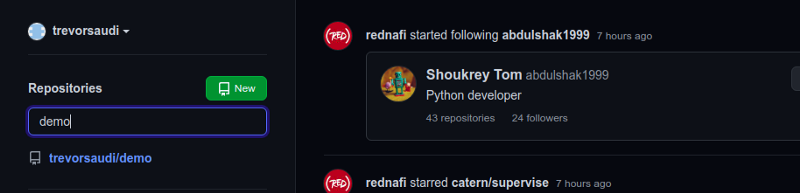
The repo is successfully added to our github
Bash scripting #
A bash script is a series of commands put together in a text file. This comes in handy in automation in linux.
Now that we can successfully consume the REST API , let’s add it all to a bash script and create a system link to have the bash script work as our very own terminal command.
Step 1: Creating a directory for our project and navigating into it
mmkdir <project_name> && cd <project_name>

Step 2: Creating the README file and initial project setup

&>/dev/null is used to redirect all output so we don’t see any of it in the terminal
Now that we have the initial project setup, let’s put the API into use

Note that after consuming the API we need to actually connect our local repository to our remote repository , push the initial change then open your text editor of choice.
Our final script can be jumbled up into a function that we will pass a command line argument. Add some CLI messages to make it look attractive :)
Don’t forget to make the script executable using chmod +x
Now lets add a system link to the bash script to we can use it as a single command anywhere in the system.
sudo ln -s <path to project> /usr/local/bin

Our final result
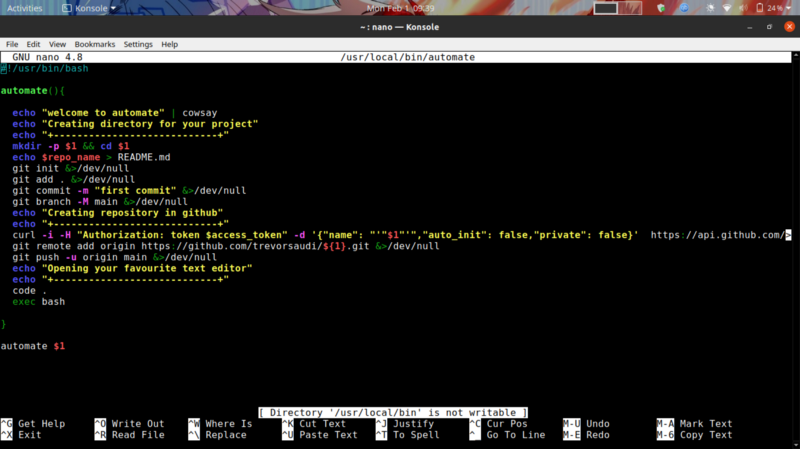
#!/usr/bin/bash

automate(){
	echo "Welcome to Automate" | cowsay
	echo "Creating the directory for your project"
	echo "+------------------------------------------------+"
	mkdir -p $1 && cd $1
	echo "$1" > README.md
	git init &>/dev/null
	git add .&>/dev/null
	git commit -m "first commit" &>/dev/null
	git branch -M main &>/dev/null

	echo "Creating the Repository"
	echo "+------------------------------------------------+"

	curl -i -H "Authorization: token $access_token" -d '{"name": "'"$1"'","auto_init": false,"private": false}'  https://api.github.com/user/repos &>/dev/null
	git remote add origin https://github.com/trevorsaudi/${1}.git &>/dev/null
	git push -u origin main &>/dev/null
	echo "Opening your favourite text editor"
	echo "+------------------------------------------------+"
	code .


	exec bash

}
automate $1
Source code to the script.
https://github.com/trevorsaudi/Project-Automation
Share, like and follow for more articles like this 😃